Rhythm Guitar Endurance Lesson: Play Tight Rhythm Guitar
Technique Much Faster
EMAIL TO GET ACCESS
By submitting your info, you agree to send it to Tom Hess Music Corporation who will process and use it according to their privacy policy.
Want to play better rhythm guitar?
You’ve clicked on the right page.
Because in this rhythm guitar endurance article…
I’ll show you the secrets to playing tight rhythm guitar riffs that sound tight and pro.
(Even if your guitar playing is just a hobby.)
And with those skills…
You’ll be able to level-up every part of your lead guitar playing too.
This will make it easy to join any band you want...
... as well as help you become a better all-around guitar player in the process.
And don’t worry…
You can easily use these rhythm guitar ideas, even if you're not very advanced yet.
(Or if your practice time is limited.)
Technique Much Faster
EMAIL TO GET ACCESS
By submitting your info, you agree to send it to Tom Hess Music Corporation who will process and use it according to their privacy policy.
Ready to have fun?
Check out this rhythm guitar endurance training video:
Now let’s go deeper into the art of rhythm guitar playing.
Here are 5 more tips for playing tight rhythm guitar that help you play better rhythm guitar riffs.
Tip #1 For Tight Rhythm Guitar Playing: Work On Your Timing
“Working on your timing” means avoiding the 3 common rhythm guitar mistakes:
- playing rhythm guitar ahead of the beat. This means: playing a note (or strumming a chord) a brief moment before the metronome click or drum hit occurs.
- playing behind the beat in your rhythm guitar riffs. This means: playing a note (or strumming a chord) a brief moment after the metronome click or drum hit occurs.
- playing all over the place (some notes are ahead of the beat and some – behind the beat).
Your timing is usually the first thing to slip when you run out of rhythm guitar endurance.
How can you tell if you’re ahead of the beat or behind the beat in your rhythm guitar riffs?
If you can’t tell simply by listening to yourself play rhythm guitar, then slow down the audio of your guitar playing to half speed.
This makes it easier to tell whether your rhythm guitar playing is ahead of the beat, behind the beat, or both.
When you get clear on what issues are affecting your timing, here is how to fix them and get better at playing tight rhythm guitar riffs:
1. Clap the rhythm with your hands. This is very helpful if you’re struggling to internalize the rhythm of your guitar riff and can’t play it with any consistency.
Clapping the rhythm in time is much easier than playing it on guitar and is a great foundation for tight rhythm guitar playing.
Pro tip: if you can make the click ‘disappear’ when clapping your hands on top of it – you’re doing great. The click ‘disappearing’ is an audio illusion that occurs when you clap perfectly in time and no longer hear the metronome.
2. Simplify the rhythm: when you can clap the rhythm of your guitar riff in time...
... the next step to playing tight rhythm guitar is playing that rhythm of your riff on guitar using just one note or one chord.
This makes it easier to focus on timing (and play the riff for longer without getting tired – developing your rhythm guitar endurance).
When you get more comfortable playing the rhythm in time, begin to play the guitar riff as normal (play all of its notes and chords).
2. Exaggerate the timing mistake: If you tend to play ahead of the beat, try (briefly) making your playing even ‘more’ rushed. And if you tend to drag behind the beat, try (briefly) making your playing even ‘more’ delayed.
This makes the mistake more obvious and helps you play in time when you go back to playing like normal.
You can also exaggerate the mistake in the opposite direction. If you tend to rush ahead of the beat in your rhythm guitar riffs, try dragging behind the beat on purpose. (And vice versa.)
This builds a lot of control and makes your it easier to play tight rhythm guitar.

Tip #2 For Tight Rhythm Guitar Playing: Work On Your Palm Muting
Most rhythm guitarists take palm muting for granted and end up making one of 2 mistakes that limit their ability to play tight rhythm guitar:
1. Too much palm muting. This happens when you apply too much pressure on the strings to the palm (which uses up a lot of energy and wrecks your rhythm guitar endurance)...
... or when you move your hand too far away from the bridge when palm muting.
2. Inconsistent palm muting. It happens when you vary the intensity of your muting at random.
Question: “Tom Hess, but why is it a mistake to change the muting intensity of the rhythm guitar riffs I'm playing?”
Answer: The mistake happens when the change in muting intensity happens ‘at random’. For example: if you double track a rhythm guitar riff and both tracks change the muting intensity in the same way and at exactly the same time...
 How To Create Killer Guitar Licks
Get tons of new ideas to improve your lead guitar playing creativity.
 Improve Guitar Playing Creativity
Learn the main reasons why you
struggle to be creative on guitar.
 Become A Much Better Songwriter
Learn new and innovative ideas to
quickly improve your songwriting.
... that is an example of perfectly tight rhythm guitar playing.
But if the changes in palm muting happen in different places and in different amounts...
That is the opposite of tight rhythm guitar playing and is a mistake.
What’s the best way to tighten up rhythm guitar palm muting (without it hurting your rhythm guitar endurance)?
Start by playing a single note (or chord) with whatever amount of palm muting you normally use.
Playing one note (or chord) makes it easy to focus your listening only on palm muting (without being distracted) by playing other notes.
Begin to experiment with using more or less palm muting on the chord until you find the amount of muting that feels and sounds just right.
The next step?
Practice playing the same chord (or note) with that exact amount of palm muting (no more and no less) for 1 minute.
This trains your brain, your ears and your hands to play tight rhythm guitar (and boosts your rhythm guitar endurance too).
When this becomes easy, add more notes (or more chords) to do this exercise on more advanced rhythm guitar riffs.
Watch this video for more rhythm guitar playing palm muting tips:
Tip #3 For Tight Rhythm Guitar Playing: Work On Excess Muscle Tension Control
Excess muscle tension is a killer of rhythm guitar endurance (and tight rhythm guitar playing).
When you play guitar with excess tension, it becomes much harder to play in time (and play with consistent palm muting). Tension also makes it much harder to build guitar speed.
How do you relax excess muscle tension in your rhythm playing?
One of the best ways to do it is through a tension audit.
A tension audit works like this:
Start by playing your rhythm guitar riff at a moderate tempo (60-70% of your top speed) and rotate focus through different parts of your body to relax them. Start with your jaw (and tongue) and relax both.
Then continue to relax your shoulders, your upper arms, your stomach, your thighs, calves and feet.
Find the fastest speed where you can play the riff without tension flaring up in those parts of your body... and practice to increase that speed (without increasing the tension) over time.
Watch this video to see a demonstration of how to do a tension audit (this practice technique works equally well for both rhythm and lead guitar playing):
Another simple and very effective way to control excess muscle tension (and boost your rhythm guitar endurance) is: exaggeration.
Similar to (temporarily) exaggerating mistakes in the timing of your rhythm guitar riffs...
You can (temporarily) exaggerate any tension you feel in different parts of your body (for 3-5 seconds) and then relax it.
Why do this?
After tensing up a muscle, it will relax to a more relaxed state than what it started with.
This helps to teach your body what it feels like to be both tense and relaxed... and through practice, you’ll train yourself to play with optimal muscle tension.
Tip #4 For Tight Rhythm Guitar Playing: Practice Creating Your Own Rhythm Guitar Riffs
Creating your own rhythm guitar riffs is a sure way to make your rhythm guitar playing practice more fun.
Here is one easy way to do it:
Write out a stream of 16th notes for 4-8 measures (rhythm only – no pitches).
Then, randomly delete some 16th notes in some of the beats inside each measure.
Now, pick up your guitar and play the resulting rhythm on one string to get familiar with it.
Begin to add notes (and/or chords) into the rhythm you created and voila: you’ve just created a riff you wouldn’t have come up with any other way.
Use this process whenever you’re feeling creatively stuck and want quick riff ideas.

Another idea:
Take any rhythm guitar riff you know (by guitar players you like) and transcribe only its rhythm.
Then write your own chords (and/or single note patterns) on top of the rhythm and boom! You have your own riffs you’re free to use in your songs.
Question: “Tom Hess, what’s the advantage of starting creating guitar riffs by coming up with rhythm instead of the notes?”
Answer: Starting with the rhythm forces you to come up with rhythm guitar riff ideas you wouldn’t have created any other way.
This makes you more creative and avoids the dreaded writer’s block. Plus, many of your newly created riffs will be harder to play. These challenges force your rhythm guitar endurance to improve.
That said, starting to write rhythm guitar riffs with the rhythm isn’t inherently ‘better’ than starting to write rhythm guitar riffs with notes (or chords).
Use both approaches to give yourself more ideas and choose the ones you like best as you work on learning to play tight rhythm guitar.
Tip #5 For Tight Rhythm Guitar Playing: Practice Combining Rhythm Guitar Riffs With Lead Guitar Phrases.
This is an advanced way to test your ability to play tight rhythm guitar and maintain rhythm guitar endurance. It also makes your guitar playing sound pro (and makes it easy to jam with other musicians).
Here is what you do:
Turn on the metronome to 100 bpm.
Play an E power chord on your guitar of 1 measure of 8th notes (4 beats).
Bend from the 7th fret on the G string up to the 9th fret with bent-note vibrato. Make the note last 1 measure (4 beats).
Switch back to the E power chord for another measure of 8th notes.
Keep alternating between 1 measure of rhythm and 1 measure of lead for 2 minutes.
Your goal is to make the transitions between the rhythm and lead seamless, clean and in time.
This is much harder to do than it sounds (especially if you haven’t yet mastered timing and palm muting control).
That is why you should keep the rhythm and lead guitar elements as simple as possible (only 1 chord and 1 note).
That said, as you improve, you can make things much harder by:
- making the rhythm part more complicated
- making the lead part more complicated
- creating 4 riffs and 4 lead guitar parts and randomly alternating between them (without stopping or pausing).
And of course:
- increasing the tempo.
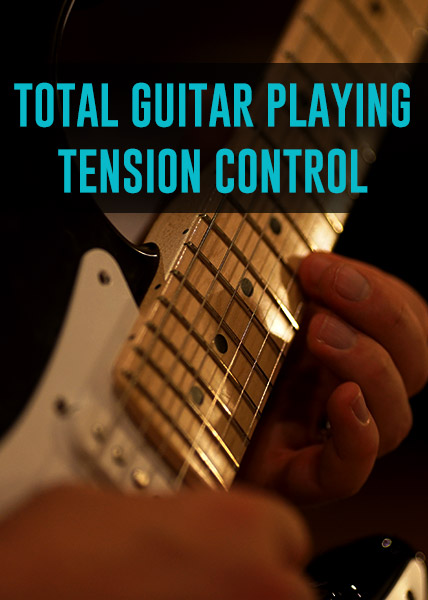
Now that you know how to improve your rhythm guitar endurance and tightness, I want to show you even more secrets to playing guitar without excess muscle tension. Excess tension is a silent killer of guitar speed and accuracy, and it makes everything you play on guitar feel like a struggle. But I show you how to defeat it once and for all in my free video master class: Total Tension Control. Watch it today and discover the guitar technique secrets most guitarists will never know.

Become an awesome guitar player with proven online lessons for guitar.
